Image Search Techniques are methods used to find images, identify what appears in a picture, locate an image’s original source, discover visually similar content, or verify whether a photo has been reused or altered. They include traditional keyword searches, reverse image search, visual search with tools such as Google Lens, image cropping, metadata checks, and newer AI-assisted verification methods.
I think of image search as more than typing a description into Google Images. A good search can answer very different questions: Where did this photo first appear? What product is shown? Is this image old, edited, or AI-generated? Can I legally reuse it? The best Image Search Techniques depend on which of those questions I am trying to answer.
How Image Search Works Today
Modern image search generally works in two directions.
The first is text-to-image search. I describe what I want using words such as “red Victorian house winter high resolution,” and a search engine returns images related to those terms.
The second is image-to-information search. Instead of describing the picture, I upload or select the image itself. Visual-search systems analyze features such as objects, shapes, colors, patterns, text, landmarks, and overall context to find related information.
Modern systems can go beyond exact pixel matching. They can often recognize that two images are related even when one has been cropped, resized, compressed, or placed inside a larger screenshot.
That distinction matters because there is no single search technique that works best for every image.
The Most Useful Image Search Techniques
1. Start With Specific Keyword Searches
Traditional keyword searching is still one of the fastest ways to find the right image.
Instead of searching:
office desk
I would make the query descriptive:
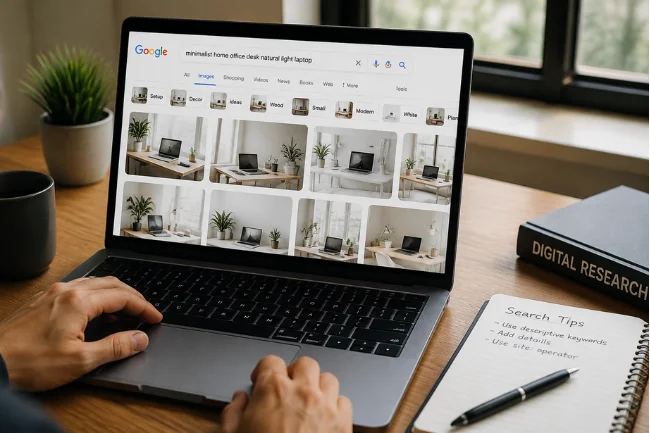
minimalist home office desk natural light laptop
Adding details such as location, year, color, object type, material, event, person, or style reduces irrelevant results.
When I already know where the image may come from, I also narrow the search by website. For example:
site:nasa.gov Mars rover image
or:
site:gov.uk London historical photograph
This is especially useful when searching government websites, museums, universities, news organizations, or company websites.
2. Refine Image Results Instead of Starting Over
A common mistake is replacing an unsuccessful query completely.
I prefer to keep the strongest part of the original search and add one identifying detail at a time.
If blue sports car is too broad, I might try:
blue sports car rear spoiler 2025
Search engines also allow users to explore related images and refine results using additional keywords. Google specifically supports adding keywords to image searches to narrow related results.
This simple technique is useful when I know what I am looking at but do not know its exact name.
3. Use Reverse Image Search to Find the Source
Reverse image search changes the question from “show me pictures of this subject” to “where else does this picture appear?”
I use it when I need to:
- Find the original or earlier source of an image
- Locate a larger version
- Discover websites using the same picture
- Investigate a viral photograph
- Check whether an image has been taken from another article
- Find modified or cropped copies
Google Lens and TinEye are two useful starting points, although they approach image discovery differently.
TinEye, for example, specializes in finding appearances and modifications of images and lets users sort results to locate older, larger, or more altered versions. Its current index contains more than 85 billion images.
One rule I follow is simple: a reverse-image match is a clue, not automatic proof of the original creator.
An older indexed result may itself have copied the image from somewhere else.
Google Lens vs. TinEye: Which Should You Use?
| Search need | Google Lens | TinEye |
|---|---|---|
| Identify objects | Excellent | Limited |
| Find products | Excellent | Limited |
| Search part of an image | Excellent | Less flexible |
| Find visually related images | Strong | Focuses more on matching |
| Find modified copies | Good | Strong |
| Investigate earlier appearances | Useful | Strong sorting tools |
| Add text to refine the search | Yes | No |
| Reverse-search privacy | Check current Google policies | Search images are not added to TinEye’s index |
I usually start with Google Lens when I do not know what something in the picture is.
I prefer a matching-focused engine such as TinEye when my main question is where the same image has appeared online.
TinEye states that uploaded search images are not added to its searchable index. Its current privacy policy says uploaded images may be retained internally for a maximum of 24 hours for repeat-search processing before deletion.
Search Only the Important Part of an Image
One of the most effective Image Search Techniques is also one of the easiest to overlook: crop the picture.
Imagine a screenshot containing:
- A person
- A car
- A shop sign
- A building
- Several icons and captions
Searching the entire screenshot gives the visual-search engine too many competing signals.
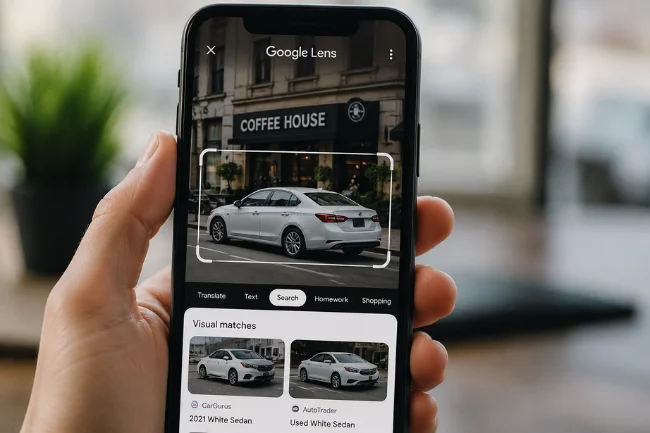
If I want to identify the car, I search only the car.
If I want the location, I may search the shop sign or building separately.
Google Lens allows users to select a specific region of an image by adjusting the selection box. Users can also refine the resulting search by asking about the image and adding keywords.
For difficult searches, I sometimes perform three separate searches from one photograph: the full image, the main object, and any distinctive background detail.
The results can be surprisingly different.
Combine an Image With Text
Visual search becomes much more useful when I treat the image as the beginning of the query rather than the entire query.
Suppose I photograph an unfamiliar chair. A visual search may return dozens of similar chairs.
Adding:
manufacturer
could help identify the brand.
Adding:
replacement cushion
changes the task completely.
Other useful refinements include:
- Model
- Price
- Location
- Year
- Recipe
- Species
- Material
- Replacement part
- Store
- Original source
This multimodal approach solves an important limitation of ordinary reverse search: two users can upload exactly the same picture while looking for completely different information.
How I Verify an Image Instead of Trusting One Search Result
For verification work, I use what I call a four-check model.
| Check | Question I want answered |
|---|---|
| Match | Where else does this image appear? |
| Provenance | What can I learn about where it came from? |
| Context | Does the claimed date, location, or story make sense? |
| Rights | Who created it, and what permission exists for reuse? |
This prevents one convincing search result from becoming the entire investigation.
Check Earlier Appearances
If someone claims that a photograph shows an event that happened yesterday, an older copy can immediately change the story.
I search several engines rather than relying on one database because no search engine indexes the entire web.
I also search cropped portions when the viral version contains captions, logos, or borders that may interfere with matching.
Check Metadata, but Do Not Treat It as Proof
Image files can contain metadata describing information such as the device, creator, copyright details, or editing history.
Metadata can be useful, but it can also be removed or changed.
Social platforms, messaging apps, screenshots, and editing software may strip information from files. That means missing metadata does not prove an image is suspicious, while existing metadata does not automatically prove authenticity.
I use metadata as supporting evidence rather than a final verdict.
Image Verification Has Changed in the AI Era
AI-generated and AI-edited imagery has made visual verification more complicated.
Visible mistakes such as strange hands or distorted text are becoming less reliable indicators as generation systems improve. I would not declare an image fake based only on an unusual visual detail or a score from one AI detector.
A better approach is to combine reverse searching with provenance information.
Google says image details can sometimes show information about how an image was made or edited using technologies including C2PA and SynthID. C2PA provides provenance information about digital content, while SynthID can identify invisible watermarks embedded in some AI-generated material.
Google’s Gemini verification tools can also check supported media for SynthID and Content Credentials.
The important limitation is that absence of a credential or watermark does not prove an image is genuine. Not every camera, editor, website, or AI system uses the same provenance technology.
Find Images You Can Actually Reuse
Finding a picture and having permission to publish it are different things.
This is one area where people often misuse image search.
Google Images provides a Usage Rights filter that can narrow results to images with associated licensing information. Google also recommends checking the actual license details with the provider and hosting website before reuse.
When I am selecting an image for publication, I check:
- Who created it?
- Where is the original source?
- What license applies?
- Is attribution required?
- Is commercial use permitted?
- Are modifications allowed?
I never assume that an image appearing on Google, Pinterest, Facebook, or another website makes it free to reuse.
Reverse image search can actually help here because tracing an image backward may lead to the photographer, stock provider, agency, or original publication.
Why Image Searches Sometimes Fail
A zero-result search does not necessarily mean an image is original.
Visual-search tools have indexing limits.
An image may not be found because:
- The source page is private
- The image is behind a login
- The website blocks crawling
- The picture was recently published
- The version has been heavily modified
- Only a tiny portion of the original remains
- The source website disappeared
- The search engine has not indexed it
- The image exists mainly inside private social-media accounts
When a search fails, I change the input rather than repeating the same upload.
I crop the image differently, remove borders, search visible text manually, isolate landmarks, identify products separately, and try another search engine.
This “search the evidence, not just the file” approach is often more productive than endlessly uploading the same image.
A Practical Image Search Workflow
When accuracy matters, I use several techniques in sequence.
First, I decide what I actually want to know. Finding a product requires a different strategy from proving when a photograph first appeared.
Next, I run a broad visual search and inspect the strongest clues.
Then I crop useful regions and search them independently.
If I am tracing a picture, I check reverse-search results across more than one engine and look for earlier appearances.
For verification, I examine context, available metadata, provenance information, visible text, dates, and source credibility.
Finally, if I intend to publish the image, I separately verify its license and creator.
That last check matters because finding the source and obtaining permission are two different tasks.
Choosing the Right Technique for the Job
There is no universal “best” image search engine.
The better question is: best for what?
If I see an unknown object, I start with visual recognition.
If I need an earlier copy of a photograph, I focus on reverse-image matching.
If the picture contains several clues, I crop it.
If I need a very specific result, I combine the image with descriptive text.
If authenticity matters, I treat search results as evidence and then check provenance and context.
This task-based approach is more reliable than expecting one platform to answer every visual question.
FAQs About Image Search Techniques
What is the best technique for reverse image search?
Start with Google Lens for broad visual discovery and use a matching-focused engine such as TinEye when you need to trace duplicate, modified, or earlier versions.
Can I search Google using a picture instead of words?
Yes. Google Lens lets you upload, select, or photograph an image and search the whole picture or a selected region.
How do I find the original source of an image?
Reverse-search the image across multiple engines, examine older appearances, search cropped versions, and trace credible results back to the earliest identifiable publisher or creator.
Can image search tell whether a photo is AI-generated?
Not reliably by itself. Combine reverse search with provenance signals such as Content Credentials or SynthID and evaluate the image’s source and context.
Are images found through Google Images free to use?
No. Search results may still be copyrighted. Check the Usage Rights filter and verify the image’s actual license before publishing or modifying it.
Final Thoughts
Good Image Search Techniques are less about knowing one clever tool and more about asking the right question.
I get better results when I combine keyword searches, visual search, cropping, reverse-image matching, provenance checks, and licensing research instead of depending on a single engine.
The next time an image catches your attention, decide what you need to learn from it first. Then choose the technique that matches that task—and verify important findings with more than one source before trusting or publishing them.

Noah Sterling is a technology research writer with 8+ years of experience covering emerging technologies, software trends, digital tools, and innovation. He creates practical, research-based articles to help readers understand the evolving technology landscape.