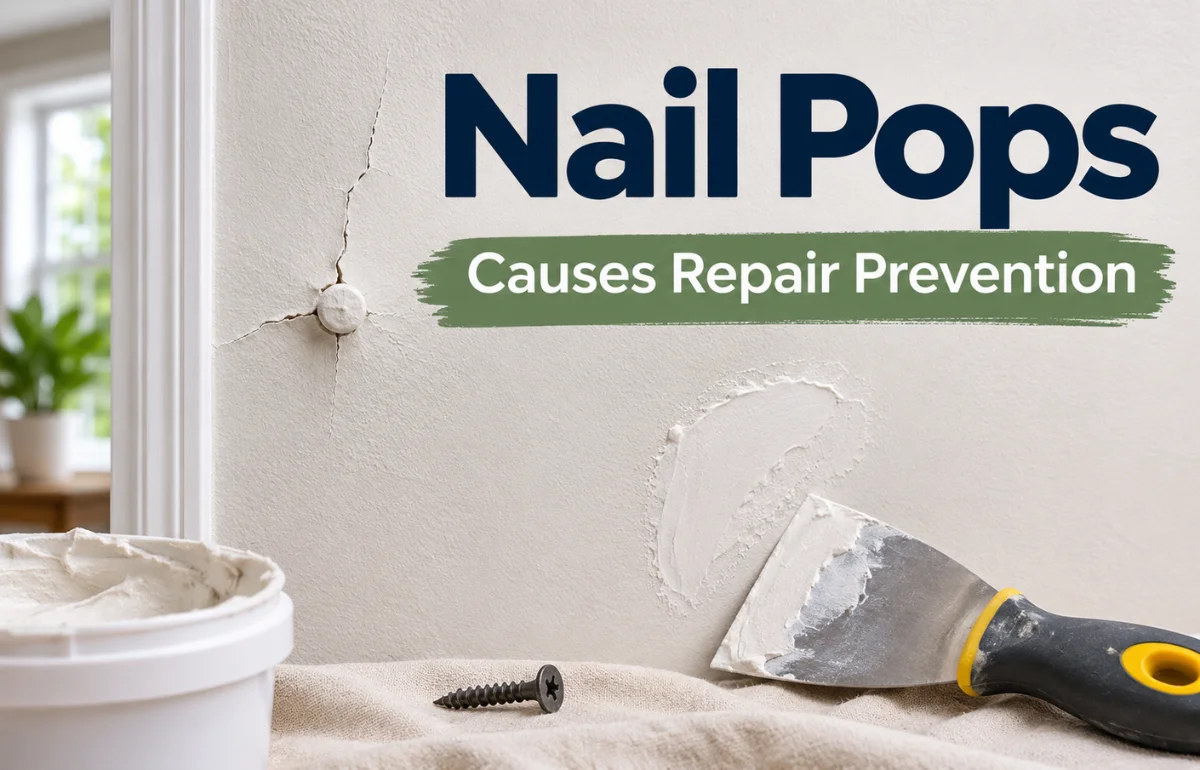
Nail Pops are small bumps, raised circles, or cracks that appear on drywall when a nail or screw pushes against or breaks through the finished surface. They usually develop when wooden framing shrinks, shifts, or no longer holds the drywall tightly in place. Although nail pops are generally cosmetic problems, repeated or widespread popping can sometimes indicate moisture damage, poor installation, or excessive building movement.
I consider nail pops one of those home maintenance issues that deserve attention without immediate alarm. A single raised fastener is usually straightforward to repair, but covering it with filler alone rarely solves the underlying problem.
Understanding why nail pops happen, how to identify them, and when professional help is necessary can save you time, money, and repeated wall repairs.
What Do Nail Pops Look Like?
A typical drywall nail pop looks like a small, circular mound beneath the paint. Sometimes the surrounding joint compound cracks, leaving a ring or exposing a metal fastener head. Other times, the defect looks like a shallow dent rather than a bump.
Despite the name, nail pops can involve screws. Builders commonly use drywall screws today, but the familiar term still applies to both types of fasteners.
I look at the pattern as well as the shape. A single bump in an otherwise sound wall suggests a localized fastener problem. Several evenly spaced spots in a vertical line often follow a wall stud; a row overhead may trace a ceiling joist. The pattern offers a clue, not a diagnosis.
Why Do Nail Pops Happen?
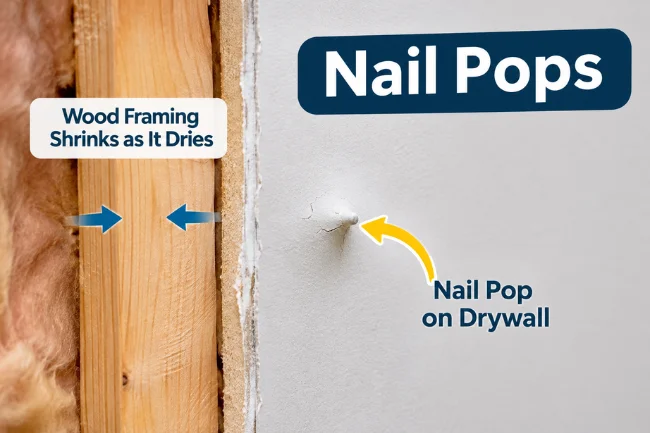
1. Wood framing shrinks as it dries
Wood contains moisture when a house is framed. As lumber dries, it can shrink across its grain and pull slightly away from the drywall. The board may then move along a fastener until its head presses through the finishing compound.
This is especially common in newer homes during their first heating season. The Gypsum Association’s repair guidance identifies lumber shrinkage as a major cause and notes that excessively long fasteners can aggravate it.
2. Drywall was not secured firmly
If an installer leaves a gap between the panel and the framing, normal pressure or vibration can make the board flex. The fastener stays relatively fixed while the drywall moves, producing a visible pop.
Driving a screw too deeply can also tear the drywall’s face paper, weakening its grip. The goal is a recessed screw head with the paper still intact, not a crater.
3. Framing twists, bows, or settles
Studs and joists are not perfectly motionless. Warped lumber, minor framing movement, or slight changes in alignment can shift pressure onto fasteners. This does not automatically mean the home’s foundation is failing.
However, a sudden increase in nail pops alongside widening cracks or sticking doors deserves a broader inspection rather than another cosmetic patch.
4. Fasteners or adhesives were poorly chosen
Incorrect screw length, unsuitable fasteners, and improper spacing can leave panels inadequately supported. Some drywall construction adhesives can also shrink while curing, contributing to raised fastener spots.
Another overlooked trigger is compression after finishing. Tightly installing a cabinet, bracket, or trim over drywall can press the panel inward and make nearby fastener heads show through.
5. Ceiling framing moves seasonally
Ceiling nail pops may appear near interior walls because roof trusses respond to temperature and humidity differences. In a condition called truss uplift, the bottom chord can move upward and stress the drywall connection.
A recurring ceiling crack where the wall meets the ceiling may point to this separate movement issue. Adding screws without understanding the framing can make matters worse.
Nail Pop or Something Else? Check Before Repairing
Not every circular mark is caused by a fastener. I use three clues: location, movement, and timing. Does the spot line up with other screws? Does the panel flex gently when pressed nearby? Did the mark appear during a dry season, after a leak, or following remodeling?
| What you see | Possible explanation | Best next action |
|---|---|---|
| Small round bump or cracked circle aligned with a stud | Nail or screw pop | Check panel attachment and refasten |
| Long, straight crack or raised strip | Drywall tape or joint movement | Inspect the seam before patching |
| Soft, stained, or bubbling surface | Moisture damage or paint blistering | Find and fix the moisture source |
| Repeated crack where wall meets ceiling | Possible truss uplift | Assess seasonal movement and framing |
| Broad bulge with sagging or spreading cracks | Loose board or a larger building issue | Arrange a professional inspection |
Do not press hard on a visibly sagging ceiling or probe a damp surface near electrical fixtures. If water is involved, fixing the fastener is not the first priority.
Are Nail Pops a Sign of Structural Damage?
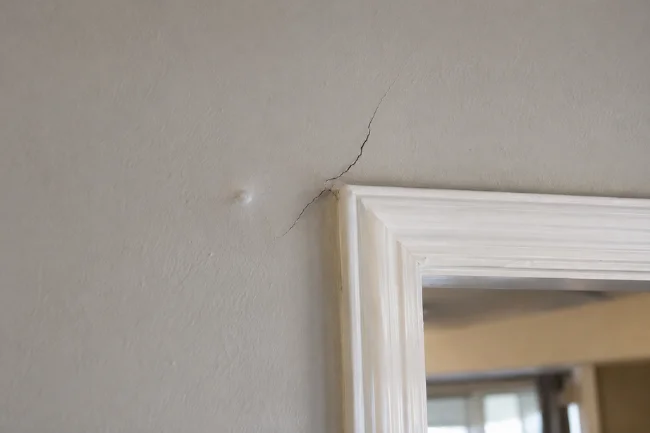
Usually, no. Isolated nail pops in an otherwise stable drywall surface are commonly cosmetic. They are particularly unsurprising when a relatively new wood-framed home adjusts to indoor conditions.
What changes my assessment is the company they keep. I would recommend an inspection when numerous pops appear suddenly, cracks widen diagonally from doors or windows, floors change noticeably, or doors begin binding for no clear reason.
Moisture stains, a musty smell, damp insulation, or recurring ceiling movement also warrant attention. These symptoms can have several causes; nail pops alone cannot confirm foundation trouble, water intrusion, or a framing defect.
If the property is new, photograph the locations and check the builder’s warranty before making extensive repairs. Documentation can be more useful than immediately repainting every spot.
What You Need to Fix Nail Pops in Drywall
For a small, dry, accessible repair, I would gather a stud finder, suitable drywall screws, a screwdriver or drill with adjustable depth, a utility knife, a putty knife, joint compound, fine-grit sanding supplies, primer, and matching paint.
A dust mask or suitable respirator, eye protection, and a drop cloth make cleanup safer. Work cautiously around electrical cables and plumbing. If you cannot identify the framing and possible hidden services, do not drive fasteners blindly.
For standard half-inch drywall on wood studs, a 1¼-inch drywall screw is a common choice. Different drywall thicknesses, metal framing, and fire-rated assemblies can require other fasteners and specifications.
How to Fix Nail Pops So They Stay Fixed
Secure the drywall before covering the blemish
First, check whether the panel moves when you apply gentle palm pressure beside the spot. If it does, the board needs a firm connection to the framing. Find the same stud or joist holding the original fastener.
Drive a properly sized drywall screw approximately 1½ inches (about 40 mm) from the popped fastener, along that framing member. Press the panel snugly against the framing as you work. For a loose section, additional properly positioned screws may be necessary.
Set each screw head slightly below the surface without tearing the paper. If the screw spins without gripping, stop: it may have missed the framing or stripped its hold.
Deal with the original nail or screw
Once the board is secure, remove the loose nail if practical, or carefully reset the protruding fastener below the drywall face. A screw can often be backed out; a nail may need a nail set or careful extraction.
Do not assume hammering the old nail deeper is a permanent cure. Without reattaching the drywall, the same movement can push the repair outward again.
Apply joint compound in thin coats
Scrape away cracked paint and loose compound, taking care not to enlarge the damaged area. Fill the old fastener location and the new screw dimple with joint compound using a small putty knife.
Let the first coat dry according to its product instructions. Add another thin coat, feathering the edges beyond the original mark. Deep damage or torn paper may require additional preparation and reinforcement rather than simply piling on filler.
Sand, prime, and match the finish
Once the compound is fully dry, sand lightly until the patch blends into the wall. Avoid sanding into the surrounding drywall paper. Remove dust, then prime the repair before painting.
Primer matters because fresh compound absorbs paint differently from a previously painted wall. Even the correct paint color may leave a visible patch if the sheen or roller texture is different. For a prominent wall, repainting a larger section may produce a cleaner finish.
The practical sequence is simple: stabilize, reset, fill, finish. Skipping the first action is why many quick repairs fail.
Nail Pops vs. Screw Pops: Is There a Difference?
Both describe a fastener showing through finished drywall. The difference is the hardware, not necessarily the cause.
| Feature | Nail pop | Screw pop |
|---|---|---|
| Fastener | Smooth or ring-shank drywall nail | Threaded drywall screw |
| Common concern | Nail can lose holding strength as framing changes | Poor seating, damaged paper, or panel movement |
| Typical lasting repair | Secure panel with a new screw, then remove or reset nail | Secure panel with a nearby screw, then reset or remove original |
| Can happen in newer homes? | Yes | Yes |
Screws generally grip framing better than smooth nails, but they cannot prevent every problem caused by shrinking wood, moving panels, or installation errors.
Common Mistakes That Make Nail Pops Return
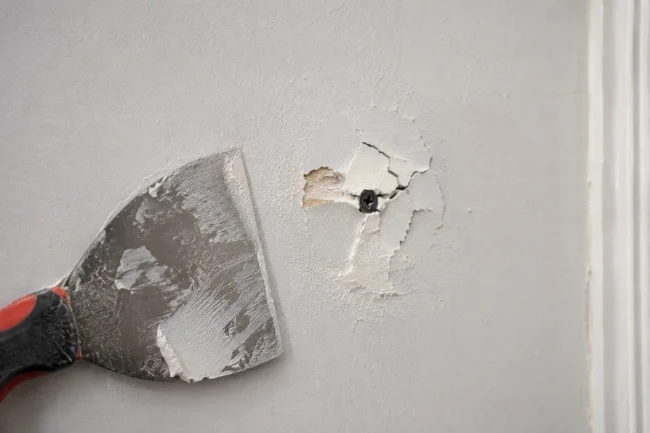
The biggest mistake is treating the bump as though it were only a paint defect. Spackling over a moving fastener conceals the symptom while leaving the cause untouched.
I would also avoid driving an oversized screw into a damaged hole, forcing a screw so deep that it tears the paper, or sanding aggressively before the compound cures. Each can weaken the repair or create a larger visible patch.
Another mistake is repairing a ceiling repeatedly without checking whether the roof trusses are moving seasonally. A wall-to-ceiling joint affected by truss uplift may need a framing-aware solution rather than more rigid fasteners.
Finally, avoid dry sanding old painted surfaces without checking for lead hazards. In the United States, the EPA advises lead-safe precautions for renovation in pre-1978 homes. Rules and building practices vary by location.
How Can You Prevent Nail Pops?
Prevention begins before the paint goes on. Dry, straight framing; correctly selected fasteners; and a tight drywall-to-stud connection reduce the chance of trouble. Installers should set screw heads just beneath the surface while preserving the paper face.
I would pay particular attention to construction sequencing. Framing exposed to rain needs an opportunity to dry before enclosure, and moisture-sensitive adhesives must cure as specified. Rushing those stages can leave movement hidden behind a perfect-looking wall.
Once you live in the home, address leaks promptly and avoid extreme, repeated indoor humidity swings where practical. These habits support the building materials, although they cannot stop all seasonal movement.
For ceilings with recurring cracks near partition walls, ask a knowledgeable contractor about truss movement and appropriate drywall attachment details. Blindly tightening the corner is not a prevention strategy.
When Should You Repair Nail Pops?
If a fastener pop appears during initial finishing or painting, it can be corrected promptly. When pops emerge after a month or more of winter heating in a new house, the Gypsum Association recommends waiting until the heating season ends, when shrinkage-related movement has had time to stabilize.
That does not mean ignoring active water damage or unsafe looseness. Those need timely evaluation. For ordinary cosmetic spots, I prefer to record their locations and repair related defects together rather than repeatedly touching up paint throughout the season.
DIY materials for a few isolated pops are generally inexpensive, but repair time depends on drying, sanding, priming, and paint matching. Professional pricing varies with access, ceiling height, texture, and how much finishing is required.
What If Nail Pops Keep Coming Back?
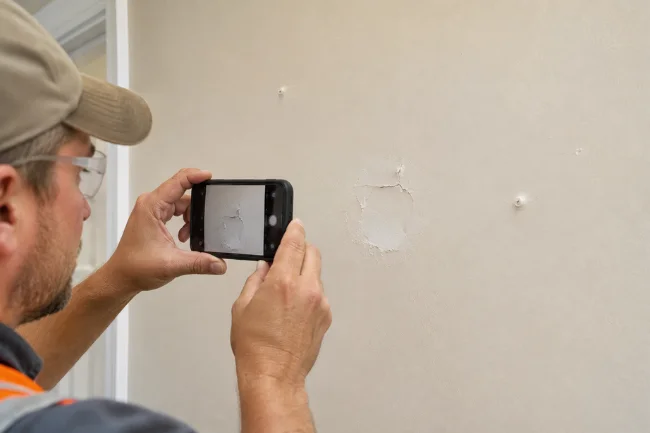
A recurring pop is useful evidence: either the drywall is still moving, the replacement fastener did not hold, or a larger source of movement remains unresolved.
Before another patch, check whether the same exact location has failed or whether new spots are spreading along the framing. Photograph the wall from the same angle, with the date, so you can distinguish an old repair from a developing pattern.
If several properly secured repairs fail, or the surface flexes broadly, I would call an experienced drywall contractor. If the problem comes with widening structural cracks, sagging, persistent leaks, or substantial building movement, a qualified building professional should investigate the underlying cause.
Final Thoughts
Nail Pops may be small, but a lasting repair depends on what is happening behind the paint. In most cases, securing the drywall to sound framing before applying compound is the difference between a durable fix and another visible bump.
Start by checking the pattern, testing for movement safely, and looking for moisture or cracking. Repair an isolated cosmetic pop with the right fastener and finishing materials; seek professional help when the evidence suggests something larger.
Frequently Asked Questions About Nail Pops
Are nail pops normal in a new house?
Yes. Drying lumber and early seasonal movement can cause isolated nail pops in new wood-framed homes, even when the house is otherwise sound.
Can I fix nail pops without repainting?
You can secure the loose drywall without repainting, but concealing the damaged compound usually requires primer and paint for an even finish.
Do nail pops mean my foundation is settling?
Not necessarily. Most are related to drywall attachment or lumber movement; investigate further if they occur with widening cracks, sticking doors, or other changes.
Why do nail pops keep appearing in my ceiling?
Possible causes include loose drywall, shrinking joists, and seasonal roof-truss movement. Repeated ceiling pops deserve a closer look at the framing.
Will nail pops come back after repair?
They can if the drywall remains loose or the framing continues moving. A properly placed replacement screw lowers the risk of the same spot reopening.

Olivia Parker is a home improvement research writer with 8+ years of experience covering home design, renovation ideas, maintenance tips, and practical living solutions. She creates easy-to-follow content to help readers make informed decisions about improving their homes.