
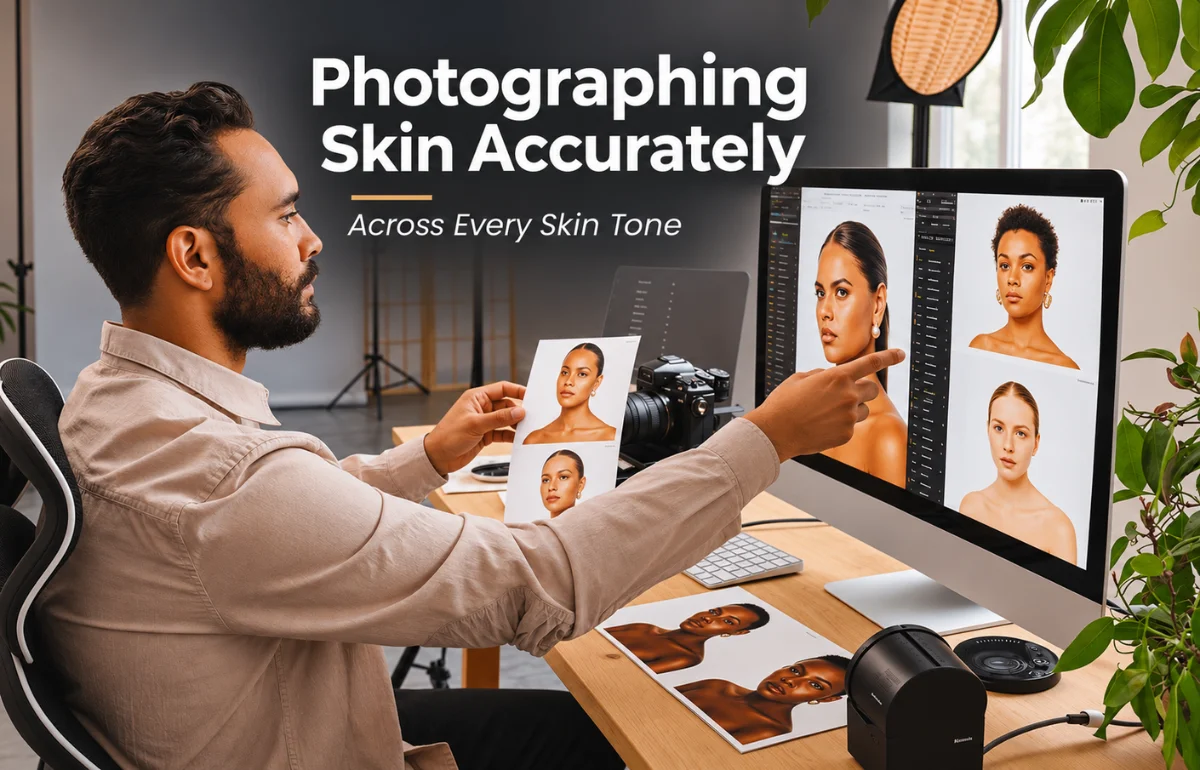
For most of the twentieth century, colour film was calibrated using a reference card showing a light-skinned woman.
Kodak’s Shirley cards were the industry standard for setting colour balance in processing labs, and the chemistry was tuned to render that reference accurately. Everything else was rendered relative to it. Deeper skin tones came out muddy, lost detail in shadow, and shifted colour in ways nobody had optimised against because nobody had been asked to.
The widely reported push to fix it came partly from furniture and chocolate manufacturers, who could not photograph dark wood or dark chocolate with any detail. The film improved, for those reasons.
Digital inherited some of that thinking through metering, auto white balance and face detection defaults. An AI Image Editor corrects what the camera misread, which Higgsfield places beside the rest of the beauty photography workflow, and knowing what went wrong is most of all knowing what to fix.
Why Does Auto Exposure Get It Wrong?
Because it is averaging the whole frame rather than reading the face.
A camera meter aims for a mid-grey average. Point it at a scene containing deeper skin tones and it reads the frame as dark, then brightens everything to compensate.
- Overexposure, which washes out the skin and loses its depth
- Lost highlight detail on the brightest areas of the face
- Flattened dimension, because the shadows have been lifted away
- Colour shift, as the brightening pulls the tone
- An AI Image Editor correction that cannot recover blown highlights
The result is a face that looks lit rather than photographed, and the richness that makes deeper skin tones photograph beautifully is exactly what the automatic correction removes.
Expose for the face rather than for the whole scene. On most cameras, that means switching to spot metering or working in manual exposure, and the difference in the result is immediate and obvious.
What Does Lighting Need to Do Differently?
More light, shaped carefully, which is the opposite of the usual instinct.
Deeper skin tones reflect less light, which means they need more of it to hold detail. Underlighting produces the muddy result people mistake for the skin itself.
- Add light rather than reducing it, since no AI Image Editor recovers what was never captured
- Use soft, directional sources, which an AI Image Editor cannot simulate afterwards
- Watch specular highlights, which read strongly on well-moisturised skin
- Use reflectors generously, since fill matters more here
- Avoid flat frontal light, which removes all dimension
The specular highlight point is the one beauty photographers learn quickly. Natural sheen on the skin catches light in a way that can look like shine rather than glow, and the fix is softer, larger sources rather than less light overall.
Light from one side and fill from the other. That shapes the face while keeping detail in every part of it, which is the whole aim.
What Must Never Be Altered?
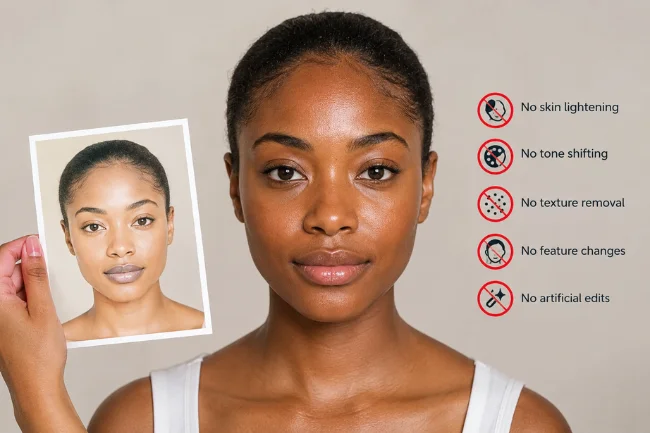
The skin tone itself. This is the line and it does not move.
- Never lighten somebody’s skin, in any image, for any reason
- Never shift the tone toward a different complexion
- Never remove texture entirely, which erases the person
- Never alter features to a different shape
- Never use an AI Image Editor to produce a complexion the person does not have
Skin lightening in published imagery is not a technical choice. It carries real consequences, particularly in markets where skin lightening products are heavily marketed and where some of those products contain mercury or unlabelled steroids that cause genuine harm.
A beauty publisher that lightens skin in its imagery is reinforcing the demand those products exist to meet, whatever the intention behind it. That holds whether the change was deliberate or simply the result of an automatic correction that nobody thought to check afterwards.
Correct the camera’s error toward what the person actually looks like. That is the whole permitted range.
How Do You Set White Balance Properly?
With a reference, at the point of capture.
Automatic white balance guesses, and it guesses based on the overall colour content of the frame, which skin dominates in a portrait.
- Use a grey card at the start of each lighting setup
- Set white balance manually from that reference
- Shoot RAW, which keeps the correction adjustable
- Re-measure when the light changes
- Correct in an AI Image Editor against the reference, not by eye
The grey card takes about ten seconds to photograph and removes the entire guessing stage from everything that follows. Photograph it once under the lighting you are using, set from it, and every frame afterwards is correctable to a known standard.
RAW matters because white balance in a RAW file is a setting rather than baked-in data. A JPEG with the wrong balance has already discarded what you need.
Mixed lighting is the remaining difficulty and the hardest to correct. Daylight through a window plus a warm bulb overhead produces two different colour casts inside one frame, and the only reliable fix is turning one of them off.
Does the Screen You Edit On Matter?
Considerably, and most people never check.
An uncalibrated screen shows you something other than what the file contains, which means every correction you make is relative to an unknown.
- Calibrate the display if you edit regularly
- Check on more than one device before publishing
- View in daylight, not only in a dark room
- Compare against a printed reference where possible
- Verify any AI Image Editor adjustment on a second screen
Phone screens in particular apply their own processing, frequently boosting saturation and contrast. An image that looks correct on a phone may be noticeably off on a calibrated display.
The simplest practical check is comparing the image against the actual person, where that is possible. Nothing else is as reliable.
What Can an AI Image Editor Legitimately Fix?
The camera’s errors, not the subject.
- White balance, corrected to a measured reference
- Exposure, where the meter got the face wrong
- Consistency, across frames shot at different times
- Colour cast from mixed or coloured lighting
- Localised correction, where one area was lit differently
Higgsfield includes this alongside the other tools as part of an AI creative suite, which matters for a publisher correcting a set of images rather than one at a time.
The consistency case is the common one in editorial work. A set of portraits shot across a morning as the daylight shifts needs matching, and doing that by eye across twenty images produces twenty slightly different results.
What none of it should do is change what the person looks like. Correcting a cast is restoration; shifting a tone is something else.
Should Texture Be Retouched?
Lightly, and the current direction is away from it.
Heavy skin smoothing removes pores, fine lines and natural variation, producing a surface that reads as plastic rather than skin.
- Remove temporary blemishes only, if anything
- Keep pores and texture, which make skin look like skin
- Never smooth to uniformity, which looks artificial
- Keep moles, scars and freckles unless asked otherwise
- Check an AI Image Editor smoothing pass at full size
The permanence distinction is the useful rule. A spot that will be gone next week is reasonable to remove; a scar that is part of somebody’s face is not yours to edit.
Readers have become considerably better at spotting over-retouching, and it now reads as dated rather than polished. Content covering routines and ingredients, like a skin care section, is undermined when the accompanying imagery shows skin nobody actually has.
Ask the subject what they are comfortable with before you start editing. Most people have clear preferences about their own face and almost nobody ever thinks to ask them.
Does Makeup Photography Need Extra Care?
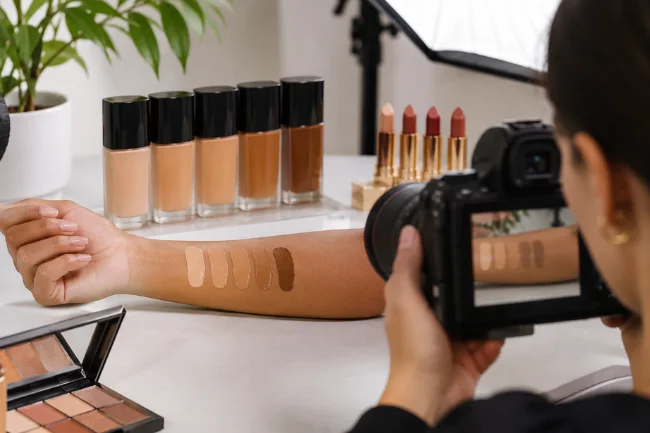
It does, because colour accuracy is the entire point of the image.
A foundation swatch, a lipstick or an eyeshadow has to appear as the product actually appears, or the photograph is misleading about something somebody is about to buy.
- Photograph swatches under measured, consistent lighting
- Shoot the full range, not only the shades that photograph easily
- Avoid correcting the product colour toward what you expected
- Show it on skin, not only on a card
- Keep the AI Image Editor correction to white balance alone
The full-range point is where most beauty coverage falls short. Photographing three shades from a forty-shade range, all from the lighter end, tells the majority of readers nothing about whether the product works for them.
Shooting a shade on a card and on skin gives different information, and buyers need both. A swatch shows the pigment and skin shows how it actually sits.
Where a brand has supplied products, say so. The disclosure rules apply to gifted items exactly as they do to paid placements, and beauty is a category regulators watch.
Lighting consistency matters more here than anywhere. Two swatches photographed an hour apart under changing daylight are not comparable, and readers will compare them.
Does Any of This Have Legal Weight?
In several markets, yes, for commercial imagery.
France, Israel and Norway require disclosure where a model’s body shape has been digitally altered in advertising, and the direction elsewhere is similar.
- Body alteration in an AI Image Editor triggers disclosure in several countries
- Advertising codes separately prohibit misleading representations
- Before and after imagery must be comparable in lighting and preparation
- Results shown must be achievable with the product as used
- A product claim in an image is a claim regardless of wording
The comparability requirement is the one beauty publishers meet most often. A before shot in harsh overhead light and an after in soft window light is not a fair comparison, and regulators have acted on exactly that.
Where a commercial relationship exists, including gifted products, the advertising rules apply whether or not money changed hands.
How Should a Set Be Kept Consistent?
By measuring once and applying everywhere.
- Record the white balance value for the AI Image Editor pass
- Note the lighting setup beside the Higgsfield project, so a reshoot matches
- Apply one AI Image Editor correction across the set, then adjust individually
- Keep the originals untouched outside Higgsfield
- Store the Higgsfield project holding the treatment
Correcting images one at a time produces a set that does not match, because each decision was made against the previous image rather than against a measured standard.
Start from the measured reference, apply it to everything, and only then adjust the frames that genuinely need it.
Keeping the originals matters for the same reason it matters anywhere. A correction that went too far is reversible only if the source survives.
What Would One Shoot Involve?
An afternoon, with the setup decided first.
- Photograph a grey card under the final lighting
- Set white balance manually from it
- Meter for the face, not the frame
- Add light rather than reducing it
- Shoot RAW throughout, before Higgsfield sees anything
- Correct the whole set in an AI Image Editor from the reference
- Save the Higgsfield treatment for the next session
Then show the subject the images and ask whether they look like themselves.
That question is the only test that matters, and it is the one almost nobody asks.
FAQ’s
Why do darker skin tones photograph badly on auto?
The meter averages the frame, reads it as dark, and overexposes. Expose the face instead.
Does deeper skin need less light?
The opposite. It reflects less, so it needs more light, softly shaped, to hold detail.
Can an AI Image Editor correct skin tone?
Only toward what the person actually looks like. Lightening or shifting the tone is never acceptable.
Should skin texture be smoothed?
Lightly, if at all. Removing pores entirely reads as artificial, and readers now notice.
Is altered imagery regulated?
In France, Israel and Norway, commercial images with altered body shapes require disclosure.
Conclusion
The reason skin tones photograph unevenly is historical rather than inevitable, and most of the correction happens at capture rather than afterwards.
An AI Image Editor fixes what the camera misread, which is white balance, exposure and consistency across a set, and nothing beyond that.
Photograph a grey card, meter for the face, add light rather than taking it away, and keep the texture. The person should recognise themselves in the result.

Isabella Hart is a beauty and self-care writer with 7 years of experience creating practical content about skincare routines, beauty habits, personal care, and confidence-building practices. She focuses on sharing simple, research-informed guidance to help readers make informed choices and develop routines that support healthy, natural beauty.